


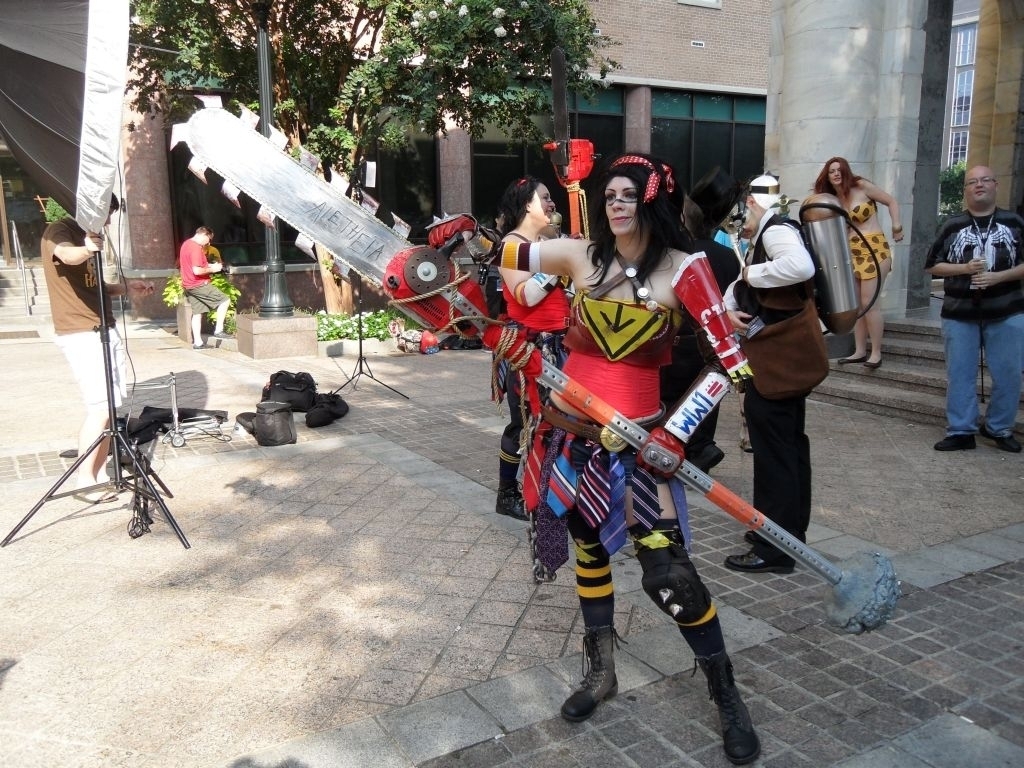
This tutorial will cover how I made the chainsaw for Fenix's Atomic Wonder Woman costume. Note that I based my design off of the in-game wallpaper/character select screen version of the chainsaw. (You can see this version on the Infinite Crisis website here.) This is different from the other cosplayers who tend to base their designs on the statuette. The major difference is the size of the chainsaw and the giant teeth on the blade.
Materials
| PVC sheeting | Tap Plastic | $12.75 |
| PVC pipe, 1" x 1' | Home Depot | ~$1.00 |
| Insulation foam | Home Depot | $19.65 |
| Sign post | Amazon | $28.19 |
| Metal supports | Home Depot | $4.88 |
| Bike chain | Amazon | $9.71 |
| Fuel/oil caps | Amazon | $11.30 |
| CDs | N/A | |
| Expanding foam | Home Depot | $4.00 |
| Misc. nuts/bolts/washers | Home Depot | ~$20.00 |
| Big, 7" bolt with nut | ||
| 2 of the biggest washers that will fit the big bolt | ||
| Another 7" bolt with nut & washers that we'll cut down | ||
| 2 1.5" bolts with nuts (sign post) | ||
| 2 2" bolts with nuts and washers (support struts) | ||
| Industrial staples | Home Depot | ~$3.00 |
| Orange electrical tape | Amazon | $5.75 |
| Rope | Home Depot | $11.98 |
| Spray paint (primer, decoration, sealant) | Michaels | ~$25.00 |
| Scrap fabric | N/A | |
| Assorted acrylic paint/gesso/varnish | Blick Art Supplies | ~$30.00 |
| A tiny bit of paper clay | Amazon | $4.90 |
| Total | ~$185.00 |
A few notes right off of the bat: I used PVC for the chainsaw blade, but MDF might give a more stable result; the PVC ended up being a little wobbly. The insulation foam comes in huge sheets (the one I list is 2 in. x 2 ft. x 8 ft.) and so far I've used that sheet for a sniper rifle, a shotgun, a pistol, and this chainsaw and that has only used half of the sheet. Also, as you'll see, my use of CDs worked but wasn't ideal; you might want to substitute something else.
Tools
- Dremel
- Coarse sanding heads
- Carving heads
- Hack saw
- Jig saw (optional)
- Electric drill
- Heat gun
- Hot glue gun
- Soldering iron
- Vice (optional)
- Sand paper (fine)
Note that the Vice was just handy to hold stuff while I cut it (specifically the sign post and the support struts) but you can get by without it. Also the jig saw isn't necessary, it just saves time and gives a better cut than you'll probably get with a hand saw.
Overview
Here's the rough idea: take an actual sign post, put some painted expanding foam on the bottom as fake concrete, and put a fake chainsaw on the other end. The fake chainsaw is going to be carved out of insulation foam because it's cheap and lightweight with a blade made from PVC and a bike chain, with a ton of bolts and a couple of support struts holding everything in place (while still allowing it to be taken apart easily/quickly for ease of transportation). Finally we're going to add various finishing details, such as a golden lasso of truth, to bring it all together. Ready? Let's go!
The Base
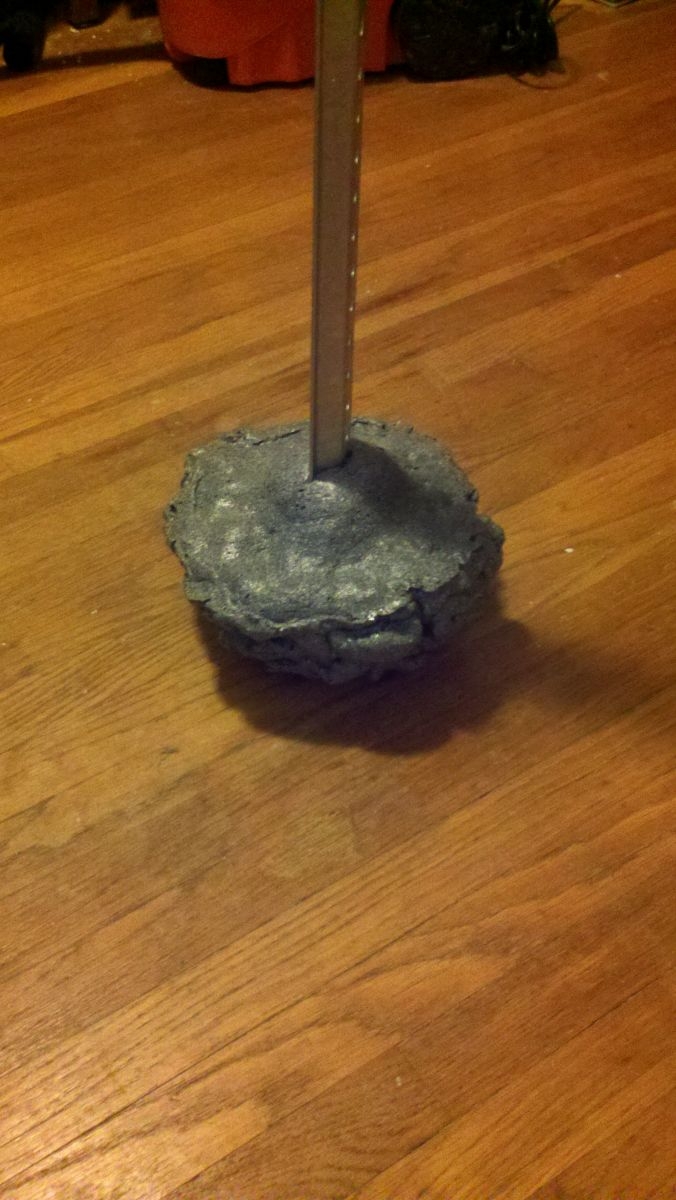 Let's start at the bottom and work our way up! The slab of cement that was ripped out of ground was actually 100% expanding foam. I can't take credit for this idea, as originally I was planning on carving up some EVA foam; when I saw Meagan Marie's WIP shot of how she made that base I decided to blantantly steal the idea. I used some parchment paper as the base, waxy-side up, and just sprayed a pile of the foam out onto the paper. I waited for it to dry, then peeled off the parchment paper. I did have a problem, here, where the middle hadn't dried (since the parchment paper didn't let it breathe) so when I flipped it over to let it breathe it actually expanded farther than I wanted. I ripped off the excess, then put a tiny bit more foam down to cover it up (smoothing it out). It still expanded a little, but I thought it just looked like the cement buckled a little where Atomic Wonder Woman tugged, so I was okay with it.
Before I got to spray painting the base I drilled out the spot where the sign post would sink into the foam (so that the hole would also have paint inside of it). I did this just by lining up the sign post, pushing it into the foam slightly (to give an indentation) and using an appropriately-sized drill bit (the same thickness [or slightly thinner, since foam is really easy to drill through] as the metal of the sign post) to drill into it. I made sure the sign post would fit snugly and then proceeded to spray paint it. A few coats, top and bottom, of grey primer followed by a few coats of the "Make it stone!" type of spray paint that gives some texture, waiting for it to fully dry between coats. Once that was done I put a few coats of sealant and the cement was ready to go.
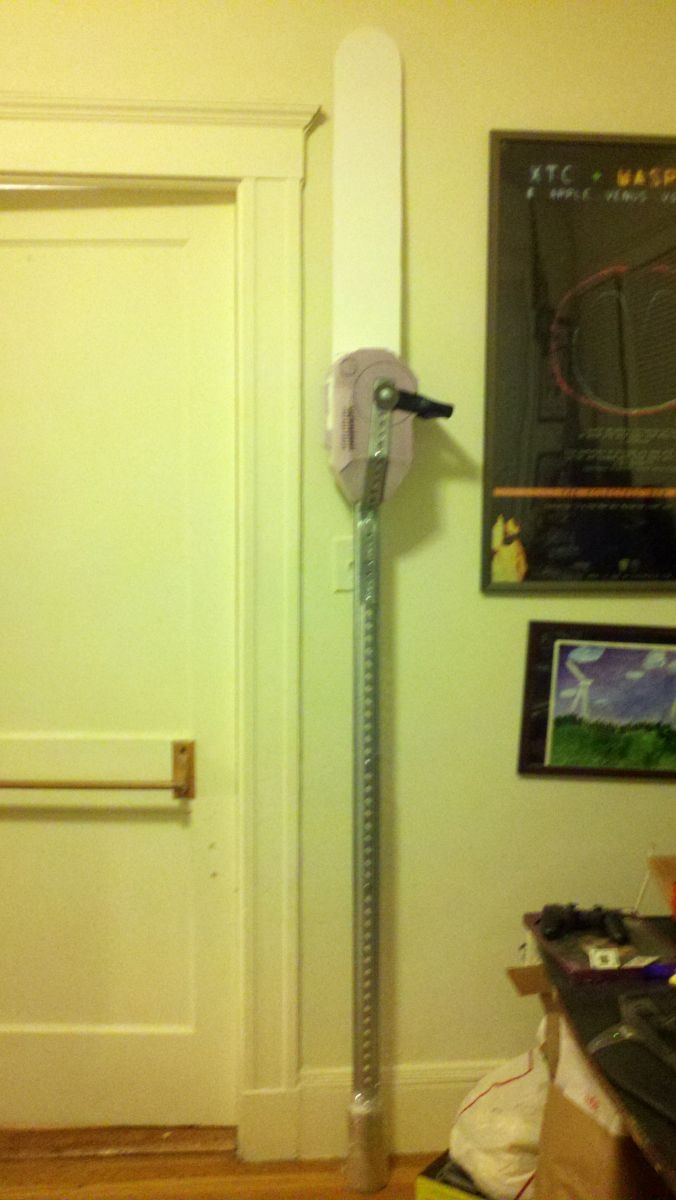
The Sign Post
Not much to say for this section. I started with a full sign post, sawed it in half with my hack saw, and used a couple of nuts & bolts to allow them to attach again. The reason for this was twofold:
- I could adjust the height of it (so that the entire chainsaw wouldn't be 8 feet tall) by altering how much the two halves overlapped. When you figure out the ideal height/amount of overlap you can even saw off a little bit of excess (leaving enough overlap for it to still be stable).
- By cutting it in half I can take it apart for easier transport.
Once that was all figured out I artfully wrapped the orange electrical tape around the sign post for the "handholds." I went based off of their position in the various pieces of reference, less on where it would actually be held.
The Chainsaw Body
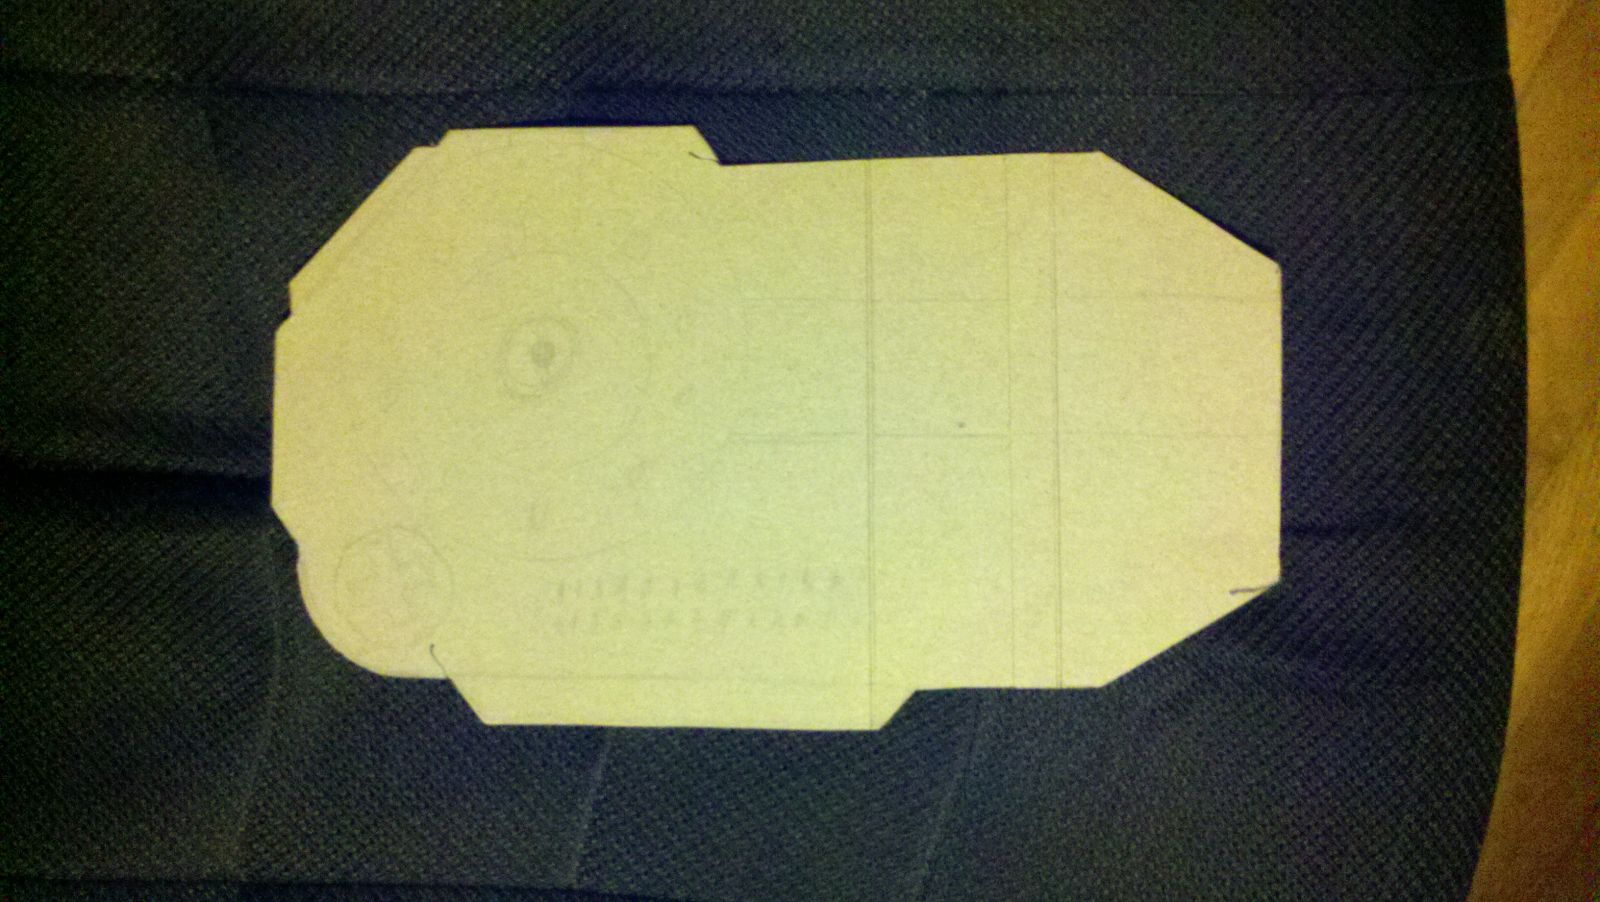 The first thing I do any time I'm going to be carving something is I try to get a good picture of it in my mind. I break it down into a 2D version of the object so I can at least do a rough cut of the material. This helps me figure out what sense of scale I want to build to. So I sketched out the chainsaw body on a piece of boxboard (I find that old cereal boxes are the best for sketching out shapes) with some pencil, not being afraid to erase and redraw any parts that don't quite look right. Once I had that figured out I transfered the outline onto the insulation foam (using sharpie, but you can use anything - you'll be sanding and painting, so it doesn't really matter) three times. I did it three times because I wanted the chainsaw to be roughly 6 inches thick. I used a hand saw to cut out the insulation foam (giving a little bit of space on the edges, since this method leaves the foam really rough and I didn't want to lose too much size when sanding it smooth).
Now that I had the three chunks of foam I busted out the hot glue gun and glued them all together, striking a balance between being liberal with the hot glue and going fast enough that the glue stays soft. You really want to press the pieces together when gluing them so that they lie flat - gaps are the enemy. If you didn't get it perfect that's okay, this is why we brought paper clay. Paper clay is a fantastic method of filling in gaps; just take little bits of the paper clay and cram them as far as you can into the gaps without causing outward pressure on the foam (you don't want to accidentally cause the pieces to separate). At this point you'll have a fairly ugly hunk of pink foam. The next section is entirely going to rely on how well you can visualize something in your head, because it's time to carve.
IMPORTANT SAFETY NOTE: When working with the insulation foam BE SURE to wear proper safety gear - you want a dust mask and safety goggles; the former because you DO NOT want to inhale this stuff (it doesn't cause any noxious fumes, but it's still really not good to get in your lungs) and the latter because when you're sanding this stuff with a dremel it can get hot and go flying randomly, a bad combination if the random direction is straight towards your cornea.
I use coarse sanding heads on my dremel to shape the insulation foam. It makes a mess, but it works really well. Think of it like working with the world's softest, lightest wood - if you've never carved this stuff before test on a piece of scrap to get a feel for how it will react to various dremel speeds. A word of warning, though - use a light hand. It's very easy to slip and carve out a section of foa that isn't meant to be carved. At that point you only have three options: 1) try and fill in the mistake with paper clay, 2) hope you can cover it up with gesso and paint or 3) start that piece over. For the big flat sections of the chainsaw I used sanding paper instead of the dremel because it's a little easier to make large surfaces uniform that way.
 Nothing special to say with the shape I went with; I tried to add some cool details by putting ridges on the front/bottom, and putting some "air vents" into the sides, all with the dremel (with various carving heads). Before going on to the next step I took another pass with paper clay, filling in any gaps, then a final pass with the sand paper to smooth it out (once the paper clay had mostly dried).
With the body shaped I drilled/carved out two sections - one where the primary bolt would slide through near the front to hold the handle, and another where the sign post would be jammed into the body. This went similarly to how I did it for the "cement" base, except that I wanted the sign post to sink in farther, so I manually dug into the foam farther than my drill bit could go with a flathead screwdriver. I also felt okay just pressing down on the body of the chainsaw to crunch the pole into the middle of it.
Chainsaw Body Details
The primary ways the chainsaw is attached to the sign post are the two support struts on either side of the chainsaw (in conjunction with the body being shoved onto the end of the post). These are just pieces of metal purchased at Home Depot that I cut down to the size I needed with my hack saw and then bent by hand and with the help of my heavy-duty pliers. The proper length for these is from the primary bolt hole near the front of the chainsaw (that we just drilled out) down to the sign post, with about 6 inches of overlap with the sign post. I kept bending the metal and testing it against the shape of the chainsaw body to make sure I hade it right. It's important for it to sit flush without digging in at any point (because that would mar the paint). The part where the body meets the pole is the trickiest part since you have to do two ~90 degree bends really close to each other.
At this point you can test that the body will clamp onto the sign post by pushing the body onto the post (lining up the hole you carved previously), and bolting the support struts to both the sign post (two smallish bolts [with washers] for stability) and the chainsaw body (with the big-ass primary bolt through the bolt-hole you drilled out). It should be pretty darn stable at this point.
For the handle of the chainsaw I used my heat gun to heat up a 1" PVC pipe and bent it by hand (SAFETY NOTE: while wearing heat-resistant gloves!!). I was using black PVC, so I didn't even need to paint it. I then cut it down to the right length (the right length allowing for some slight overlap with the primary bolt hole on each side) and proceeded to re-heat the two ends of the pipe so that I could completely flatten them. I followed that up with my dremel, sanding it down to be as flat as it could be without losing structural integrity. After that I drilled holes where it should line up the bolt hole.
The design I was basing this off of has these big, rusty, metal discs around the primary bolt hole. I was mildly at a loss for what to make these out of; when I was sketching out my chainsaw body earlier I had used some CDs to get the scale right. Since I knew it was the scale I had wanted I decided to just use CDs for these bolts; I hot-glued 4 CDs together to create each side, then drilled out the decorative holes. This... didn't work very well. The CDs wanted to snap so badly, and the force of the drill was stronger than the glue. In the end, after re-gluing and gessoing and painting it all worked out, but I probably should have used a different material.
The final bit of decoration that I think added a touch of realism (but could be skipped) was ordering actual chainsaw fuel and oil caps from Amazon. This was a bit of a gamble, since I didn't know what size they would be, but they ended up being perfect. I just carved out holes for them and glued them in with hot glue. The reference art I was using only showed one of the caps, but you can't buy just the oil cap, so I decided to add both caps. I think it helped break up a kind of boring section towards the rear of the chainsaw.
The Chainsaw Blade
 To make sure I got the blade the right size I once again sized it with cardboard first and tried to keep in mind the relative size of the blade to the body to the sign post in all of the reference material. That said I aired slightly on the size of awe-inspiringly large. Once I was confident in the size (remembering to account for the portion of the blade that would be sunk into the chainsaw body!) I transferred the pattern onto the PVC sheet and cut it out with my jig saw.
Next I worked on sinking the blade into the body of the chainsaw. This was similar to how I cut out the hole for the sign post in the body of the chainsaw, but with less jamming it on there and more carving out. I drilled out as much as I could first using a drill bit roughly the same size as the width of the PVC (erring on the small side), then I actually used a piece of the support strut I had cut off as scrap earlier to carve out the foam. I was able to get most of the way down the body, to the point where the body started to narrow. I wanted the blade to sink even farther than that, so I cut the PVC blade down to mimic the narrowing of the body and continued to carve out the slot. Once I was content with how far it sank into the body (i.e. almost the entire way) I could mark off on the blade where the primary bolt hole needed to be drilled and add that.
It was at this point I was starting to worry about stability. The blade was really long and it was only being held in place by one bolt; that meant that the only thing preventing it from rotating was the foam. To alleviate this issue I decided to add a second big bolt across the body of the chainsaw, to really stabilize the whole thing. My goal with this bolt was to hit all key parts: the blade, the support struts, the body, AND the sign post. This meant it had to be at a point where all 4 of these things overlapped in 3 dimensional space. I kind of guessed at this, since I couldn't see through the foam to know exactly how far the sign post went into the body. I drilled out another hole, drilling an extra hole in the chainsaw blade at the correct point. If I had been really slick it would have lined up with one of the holes in the sign post, but - alas! - I was not that awesome. That meant I had to drill an extra hole in the sign post for the bolt to slide through. With the extra bolt in place the entire thing felt MUCH more stable.
With the blade size all figured out I added battle damage to the blade, and etched in the name "Aletheia." The battle damage I did with my dremel, swapping out heads and just going to town, really gouging out sections. The word I etched into the PVC with my soldering iron; first I sketched it out with pencil then I carefully burned it into the PVC. SAFETY NOTE: don't breathe in those fumes - use a respirator and/or work in a well-ventilated area.
I recommend at this point painting the blade. It's going to be a lot easier to paint now than it will be later.
Time for the chain. The chain I attached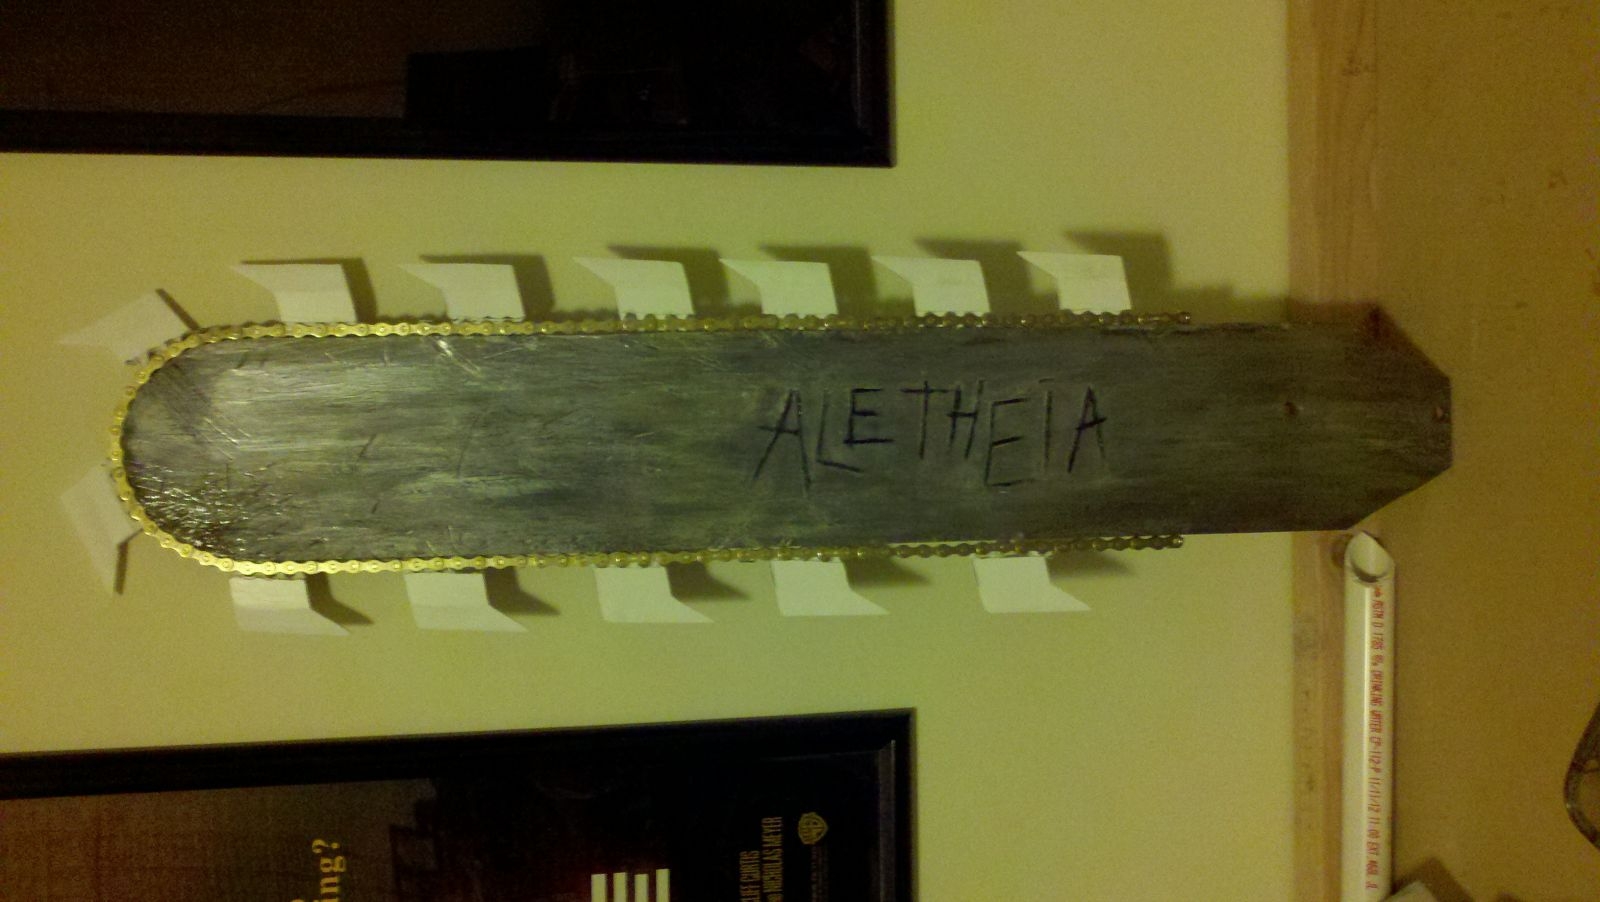 using industrial staples (the kind that you use in a staple gun). Annoyingly I couldn't find staples with the proper width at my Home Depot, so I ended up having to manually bend them to the width I wanted with my pliers. I then lined the bike chain up on the blade and hammered the staples over the chain to hold it in place. Be sure the chain is as taught as it will go when doing this. If you have a staple gun it would probably work better than hammering the stupid things in. Don't use too many staples; they'll make it harder to attach the teeth later (use just enough to secure the chain).
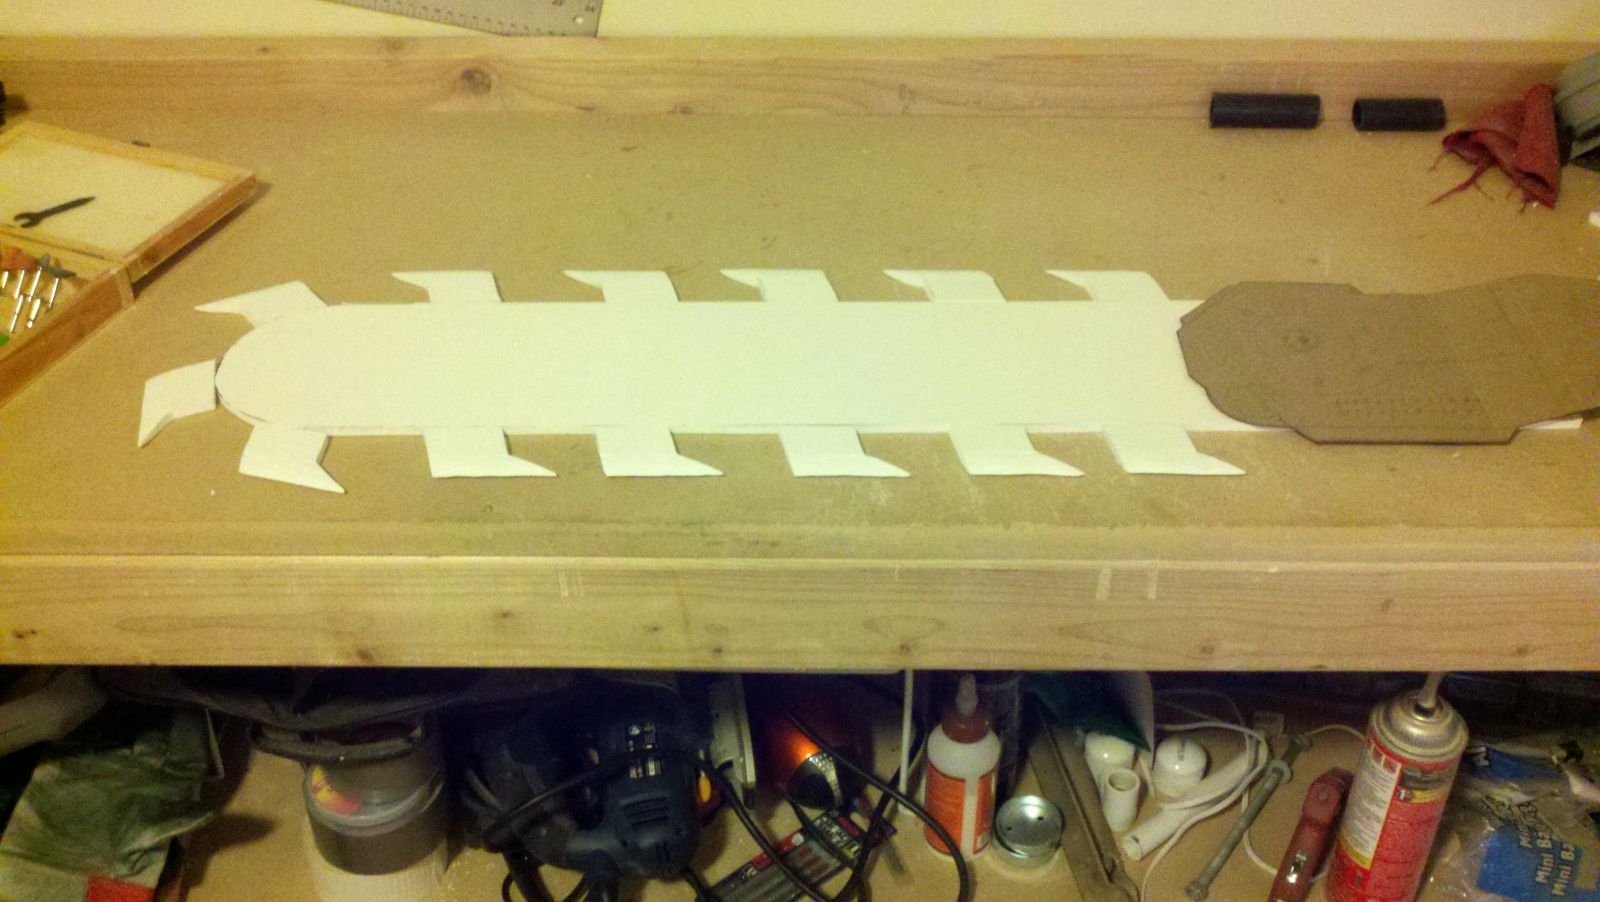
Next up we're adding the teeth. Once again I sized these with cardboard before cutting out anything. I wanted them to be bordering on comically large. When I was happy with the size I transferred it to the remaining PVC sheet 13 times and cut it out with the jig saw. I used the sanding head on the dremel to "sharpen" the teeth, bringing them to a point on the top. Next I figured out where they would be distributed along the blade, then marked where they needed to be carved away to fit over the bike chain. I proceeded to use one of the carving heads on the dremel to carve arcs into the teeth so they could snugly fit over the chain. If you've made them snug enough they should be able to stay on the blade at this point with no glue. After painting the teeth I then glued them onto the blade with hot glue (filling the gaps in the bike chain with hot glue and pressing the teeth into them). This had the added benefit of better securing the chain to the blade.
Finishing Details
At this point you can fully paint the body of the chainsaw (including the rusty metal disc pieces), and you should have already painted the blade (and its teeth). Fenix did all of the painting, so I'll let them talk about that in another post. The "cement" base can be permanently attached to the sign post (I just filled the hole in the foam with hot glue then pushed the sign post into it). We tried to strip the nuts and bolts to make them look less brand-new, but we didn't have a ton of success with that. The chainsaw can be assembled:
- Push the body of the chainsaw onto the sign post
- Sink the blade into the slot on the chainsaw body (be sure to support it)
- Line up the support struts
- Push the secondary bolt through the support struts, body, blade, and sign post and secure with nut and washers. NOTE: this bolt might be longer than necessary! If so feel free to use your hack saw to cut it down to the proper length.
- On the primary bolt you want to line things up in this order: Big washer, rusty disc, handle, chainsaw body (chainsaw blade inside), handle, second rusty disc, big washer, nut. Tighten this bad boy down until the handle no longer moves. With all of the extra stuff on this bolt you probably don't have any excess you need to cut off.
Awesome! Now you're only missing the finishing touches.
For the Lasso of Truth I just took a nylon rope from Home Depot, cut it to the proper length, and attacked it with several coats of gold spraypaint (and finished with a sealant). I didn't use a glossy sealant, so the rope lost some of its lustre for me - be sure to use glossy! There's also a piece of cloth at the junction of the chainsaw and the sign post, so we had a scrap piece of red cloth. Fenix soaked it in tea to make it darker and dirtier, then we tied it around the sign post. With that on we looped the rope around the chainsaw a few times, tied it off, and voila! One Chainsaw of Truth ready to go!
-
PVC sheeting Bike chain
-
PVC sheeting Bike chain CDs PVC pipe Fuel/oil caps Misc. nuts/bolts/washers